Deploy With Installer
The Cloud Installer is a small CloudFormation stack you install once, into a region of your choosing. It then gives you a web dashboard where you pick a Neo version and modules, fill in parameters, and deploy — no local toolchain.
This is the recommended way to stand up ESP RainMaker Neo, and the route most take. If you intend to modify the backend, or want the deployment under your own CI, use Deploy from Source instead.
Install it once per AWS account. One installer manages deployments in every region, so a second one in the same account collides with the first over shared bucket and table names.
An AWS account you own, signed in as a user or role with administrator access. The installer creates IAM roles, Lambda functions, DynamoDB tables, S3 buckets, Cognito pools and API Gateway APIs, and then deploys the Neo stacks on your behalf.
1. Deploy the installer stack
Enter the email address(es) that should be allowed to sign in to the installer dashboard and pick the region to install into, then click Install ESP RainMaker Neo. One Cognito user is created per address.
The CloudFormation Quick create stack page opens with the template, the stack name ESP-RainMaker-Neo-Installer and the InstallerEmails parameter already filled in. On that page:
- Scroll to the bottom and tick I acknowledge that AWS CloudFormation might create IAM resources with custom names.
- Choose Create stack.
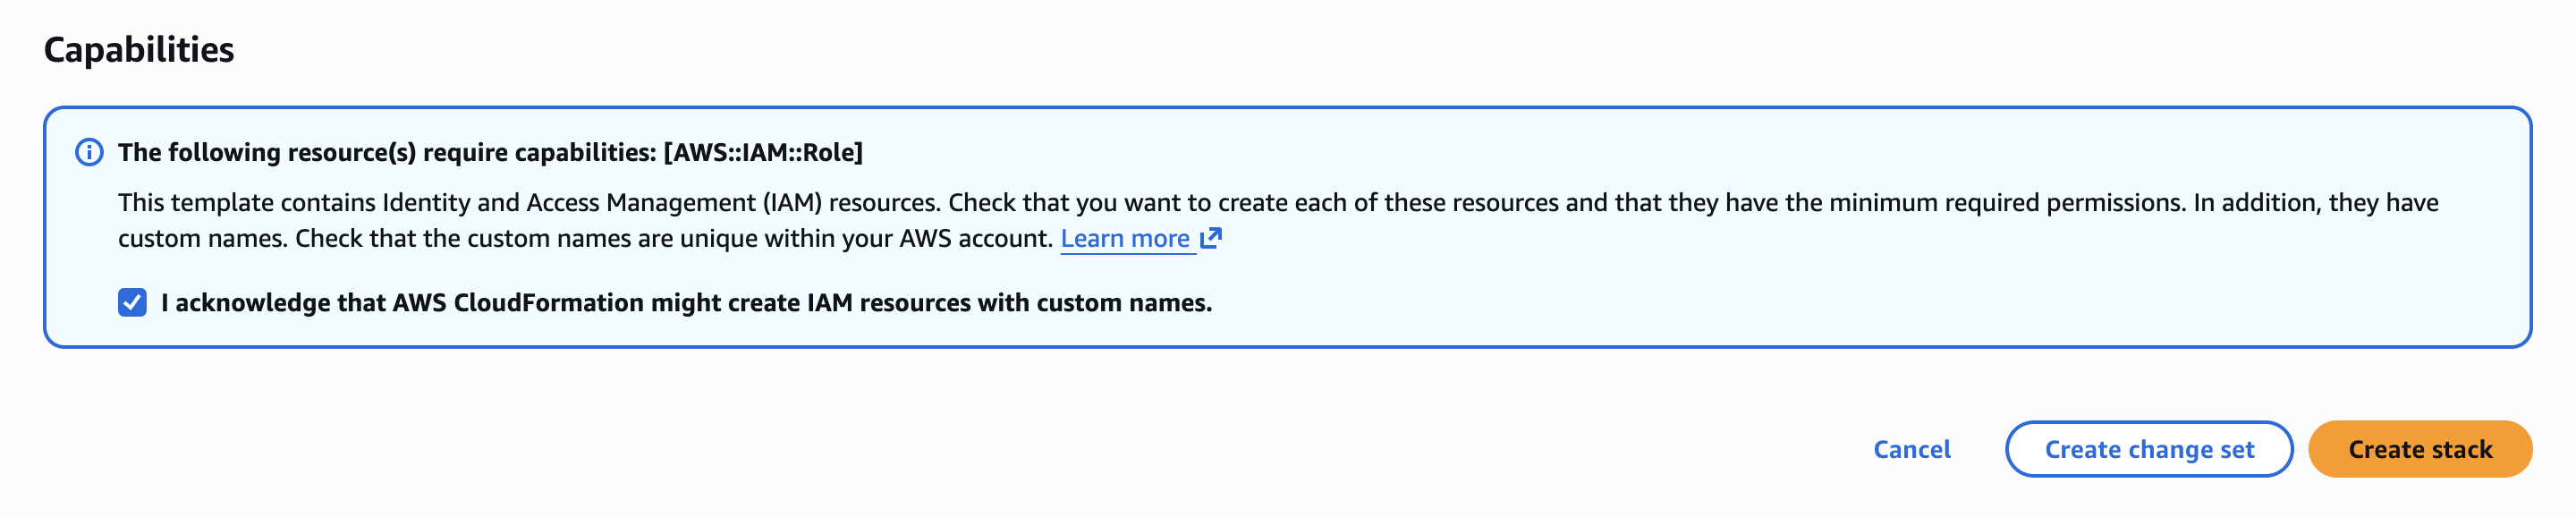
The stack takes about 5 to 10 minutes to reach CREATE_COMPLETE.
2. Sign in to the installer dashboard
Open the stack's Outputs tab and follow AdminLoginUrl. It opens the installer login page with the first InstallerEmails address and its one-time temporary password already filled in, and makes you set a new password before you get in.
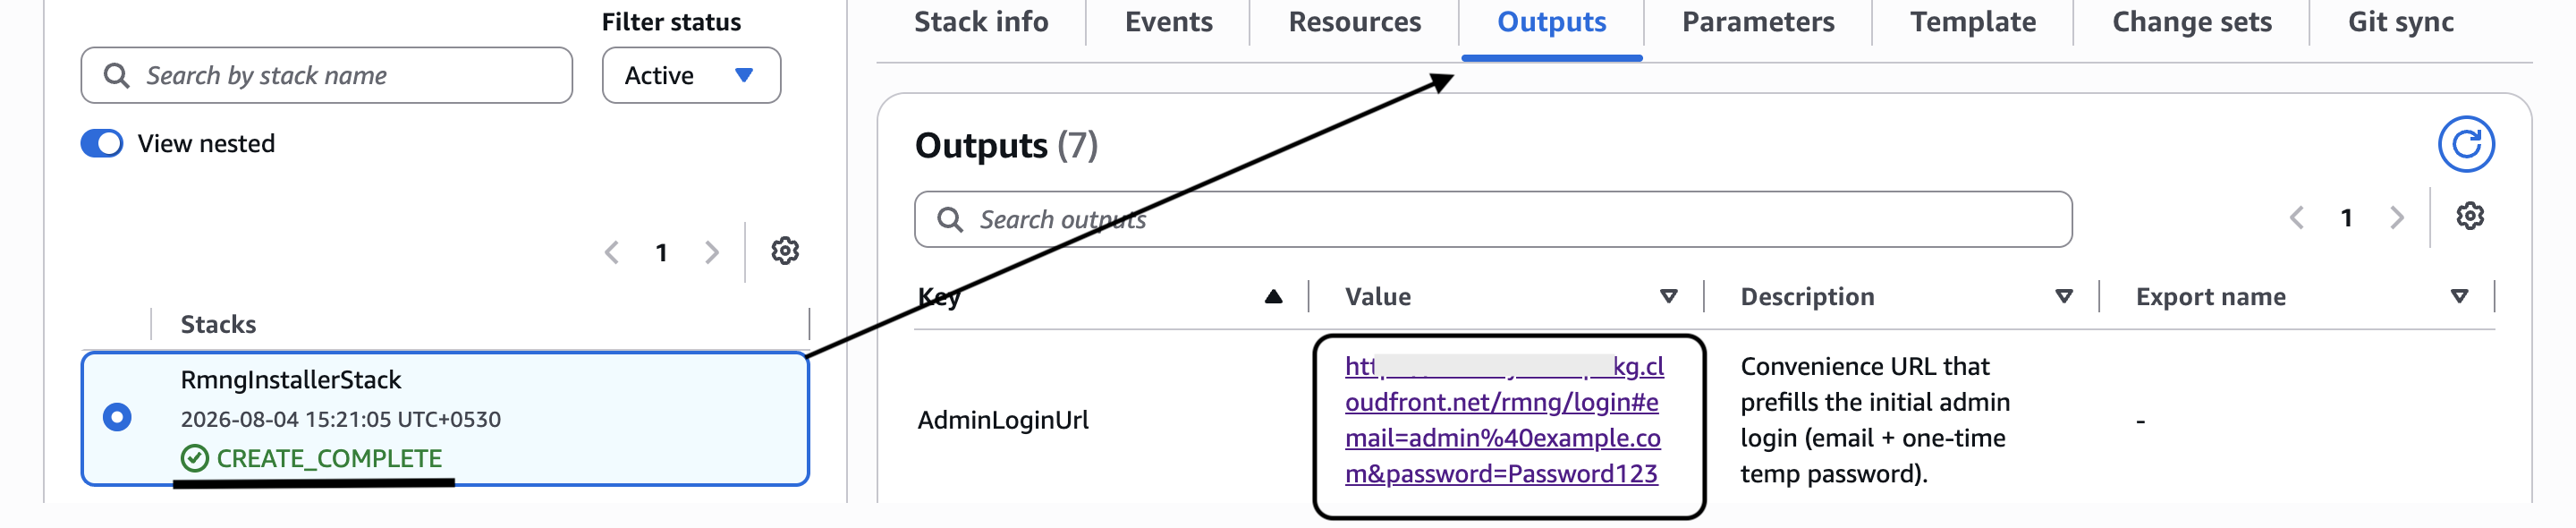
Corporate mail servers routinely block or spam-filter Cognito's automated mails, so the temporary password is never emailed — it exists only in the AdminLoginUrl and AdminTemporaryPassword outputs.
3. Pick a version and modules
- Version — listed newest-first. Once you have deployed a version, downgrades are blocked.
- AWS region — the region your Neo deployment lives in. Independent of the region the installer itself runs in, and you can deploy to several.
- Modules — the ESP RainMaker Neo package is free, and the modules marked Required are always installed:
- ESP RainMaker Neo Identity — standalone identity management system.
- ESP RainMaker Neo — core IoT cloud, and the Admin Dashboard you administer it from.
- Voice Assistants — control your devices with Alexa, Google Home and SmartThings.
- Assisted Claiming — Cloud-signed node onboarding, with the CA held in AWS KMS.
The Enterprise Plan modules below it are paid and stay locked until Espressif enables them for your account.
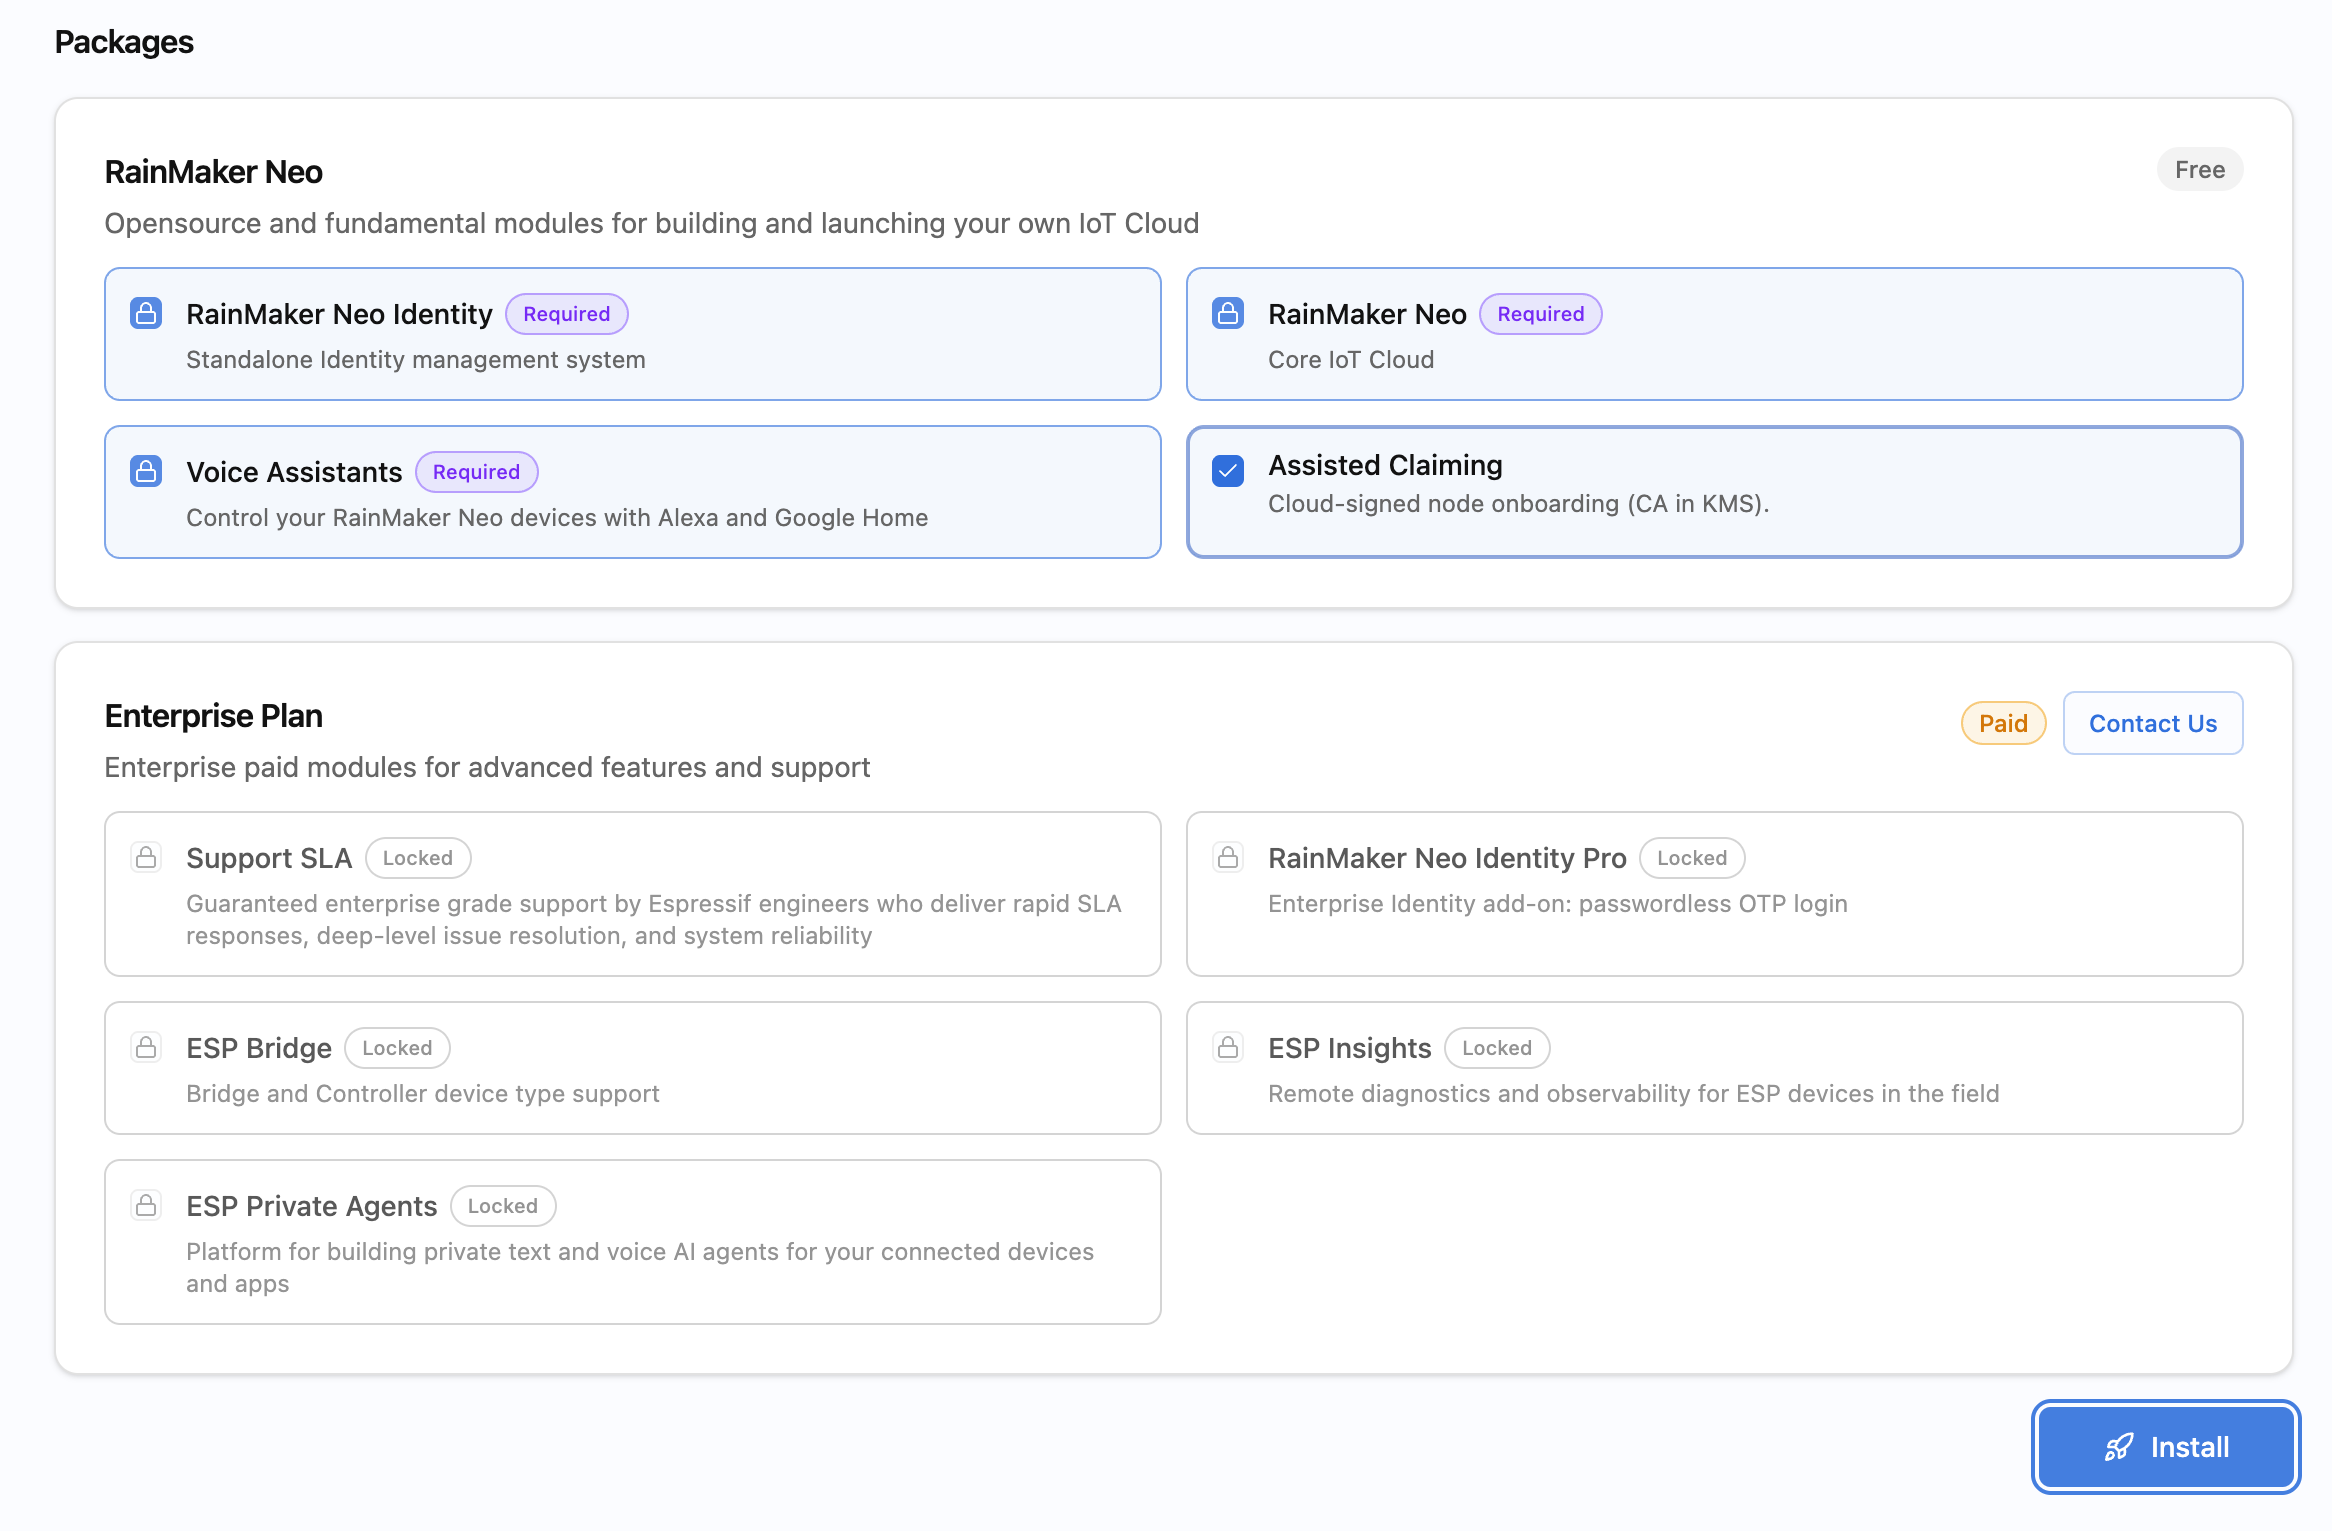
Choose Install.
4. Fill in the parameters and deploy
The installer prompts only for the parameters the selected modules need.
-
Set AdminEmails on
espuser-coreto a comma-separated list of the emails you want created as super admin users of the Admin Dashboard. Include your own: it is what you sign in to the Admin Dashboard with.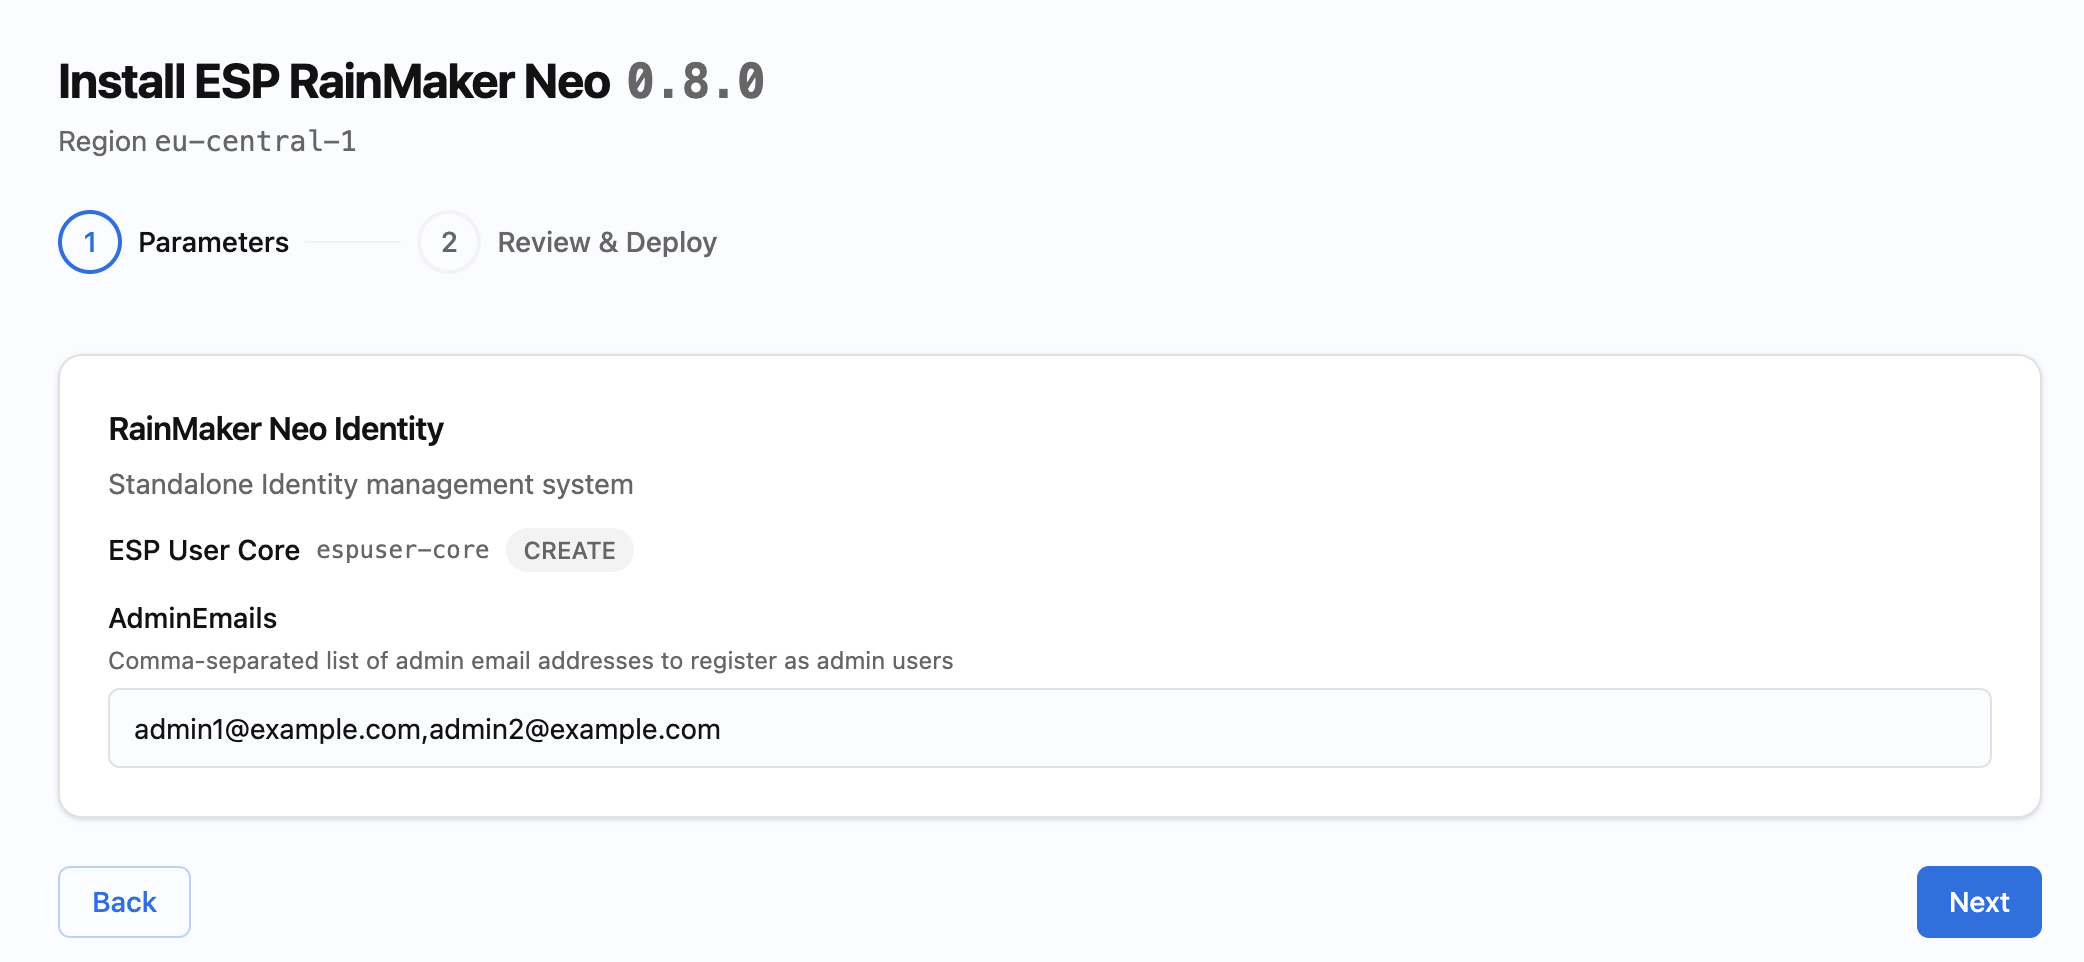
-
Choose Next.
-
Review the deployment plan.
-
Choose Deploy.
Stacks deploy stage by stage, with the stacks inside a stage running in parallel. A full deployment takes roughly an hour.
Your deployment is live
The installer home page is where you pick up the rest of the setup:
- The deployment details QR code for integration with clients
- The Admin Dashboard link
- The mobile app downloads — see the Phone app walkthrough.
- Firmware flashing — see Flash a device and the Dashboard batch flow.
Related pages
- Deploying ESP RainMaker Neo — what a deployment consists of, and the end-to-end sequence
- Deploy from Source — the CDK route, if you intend to modify the backend
- Post-Deployment Configuration — what to set up once the stacks are live