Prerequisites
Do these in order before you deploy.
1. Create a free tier AWS account
-
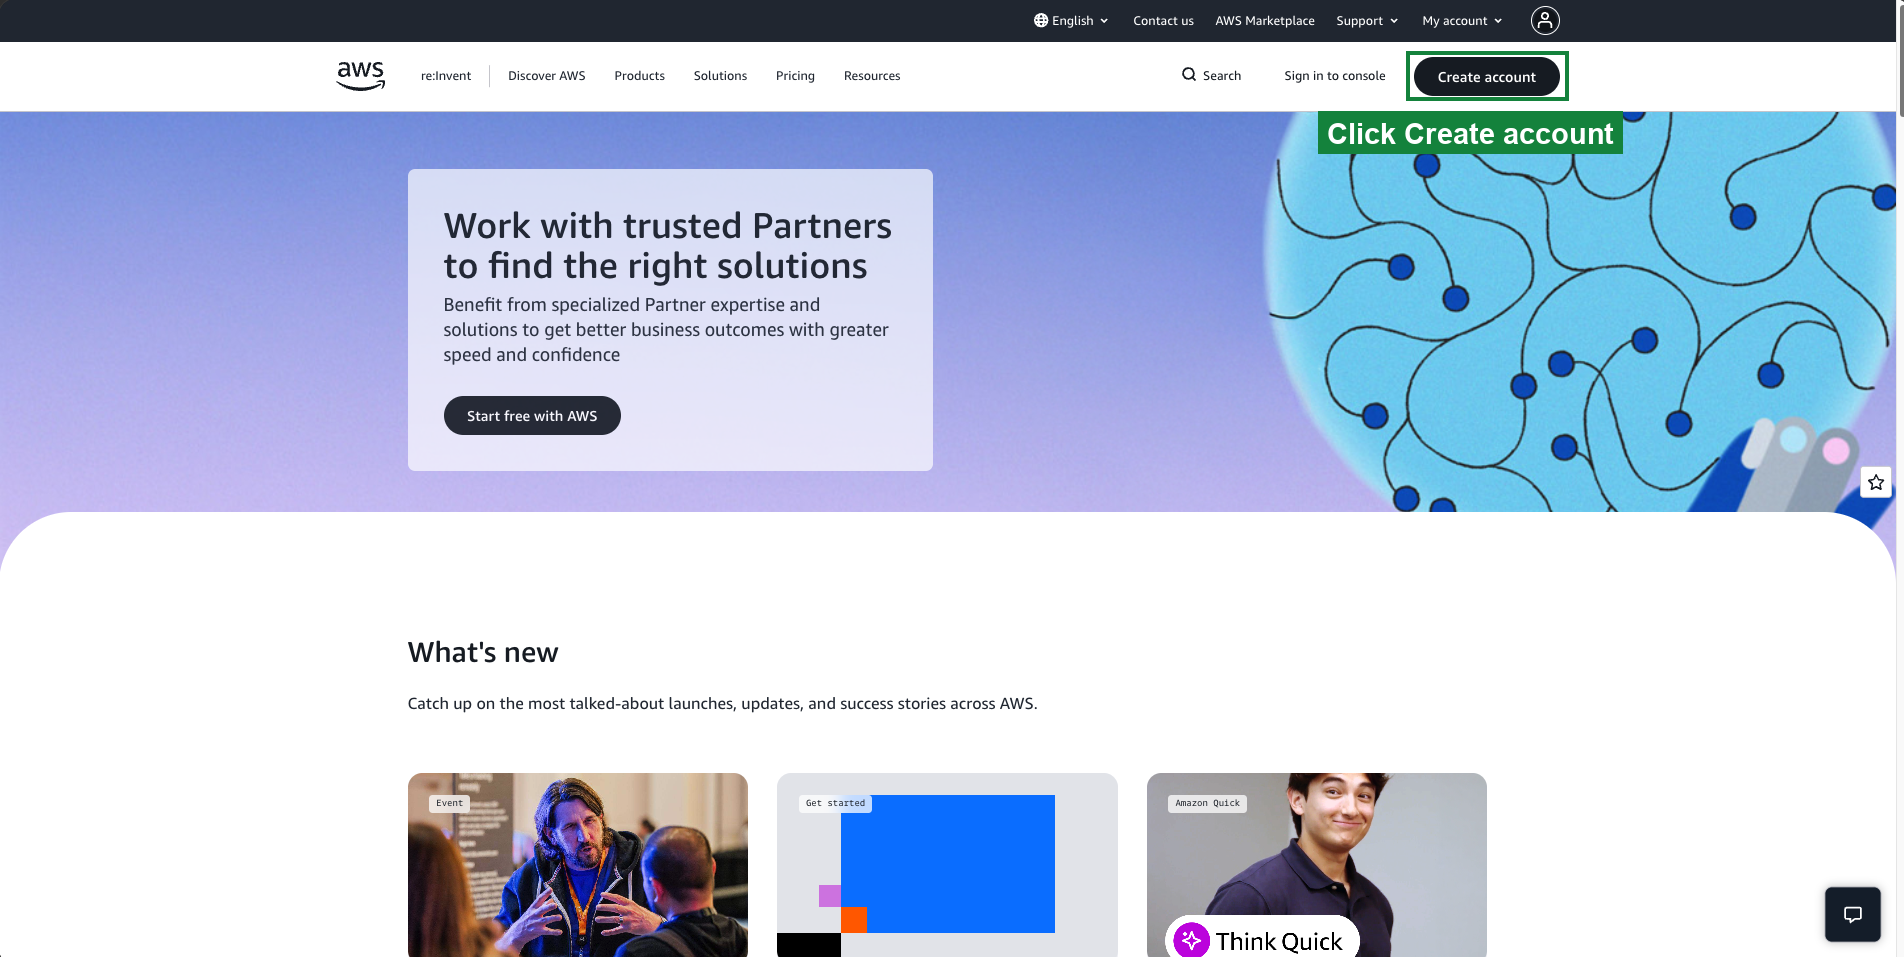
Open aws.amazon.com and choose Create account.
-
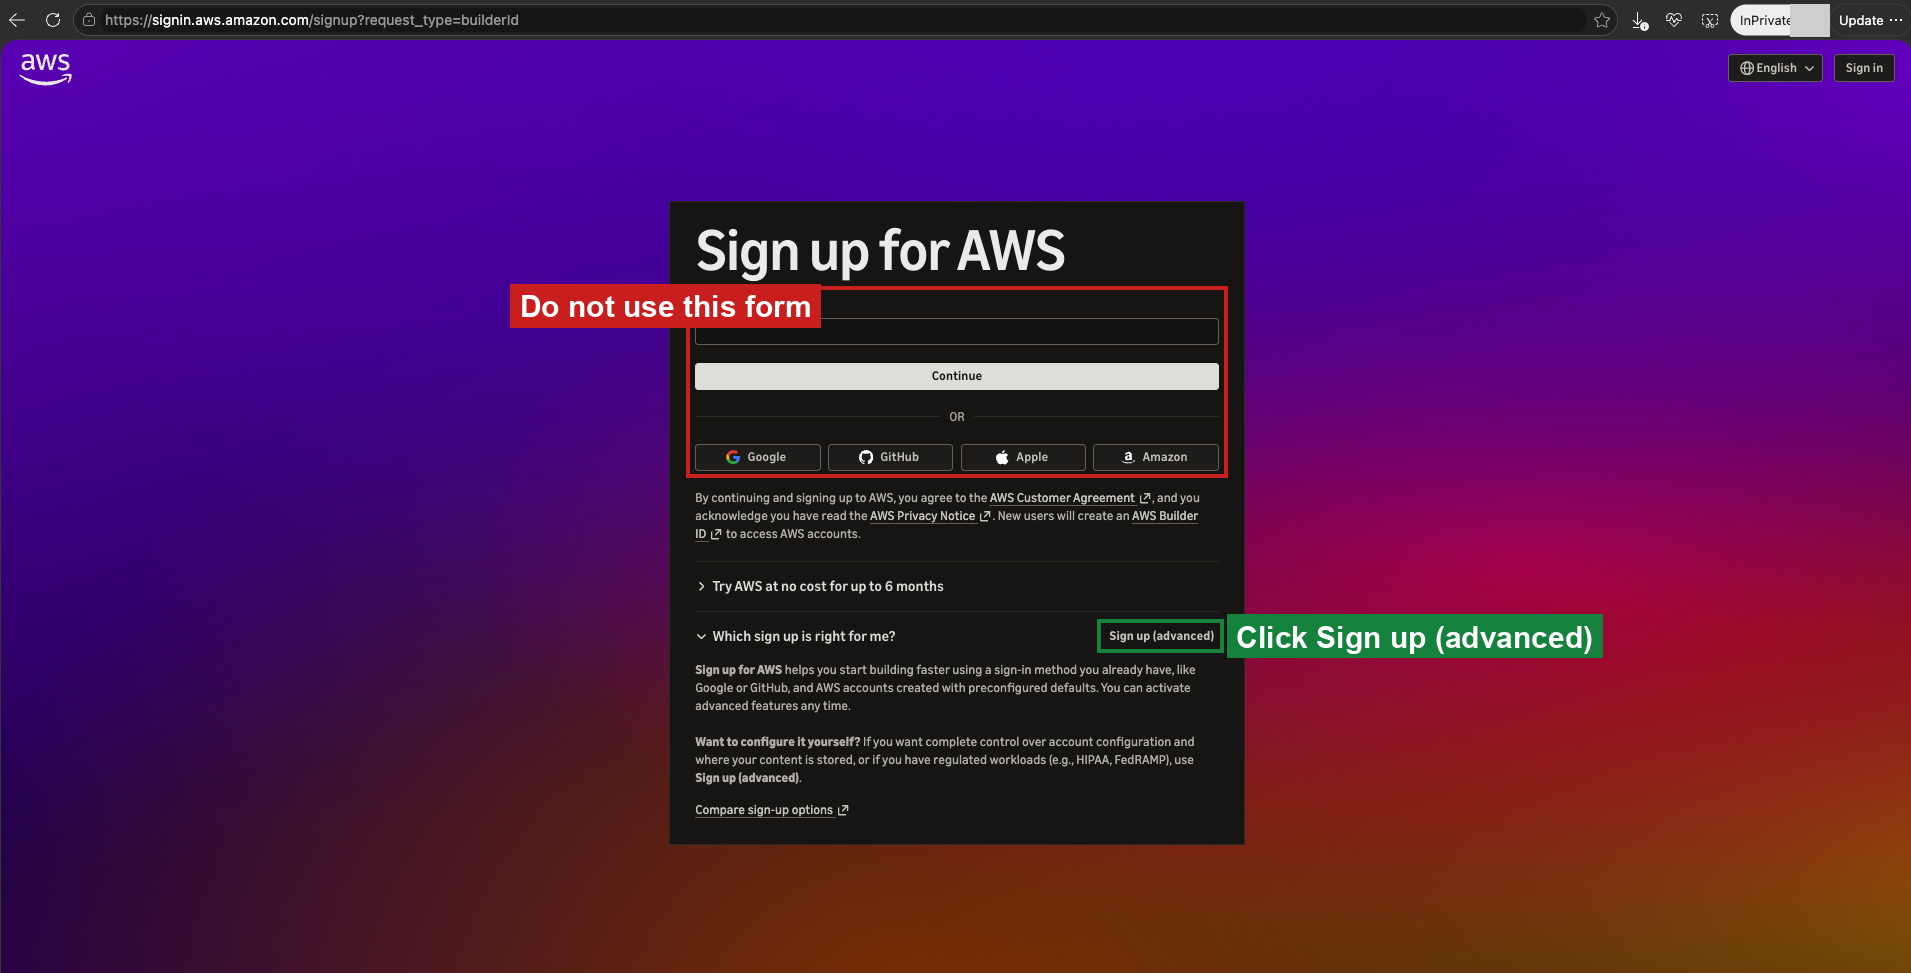
The page that opens is the default sign-up, Sign up for AWS (new). Do not fill in its form: its account comes with policies that block a deployment. Next to Which sign up is right for me?, choose Sign up (advanced). AWS explains the difference in Compare sign-up options.
-
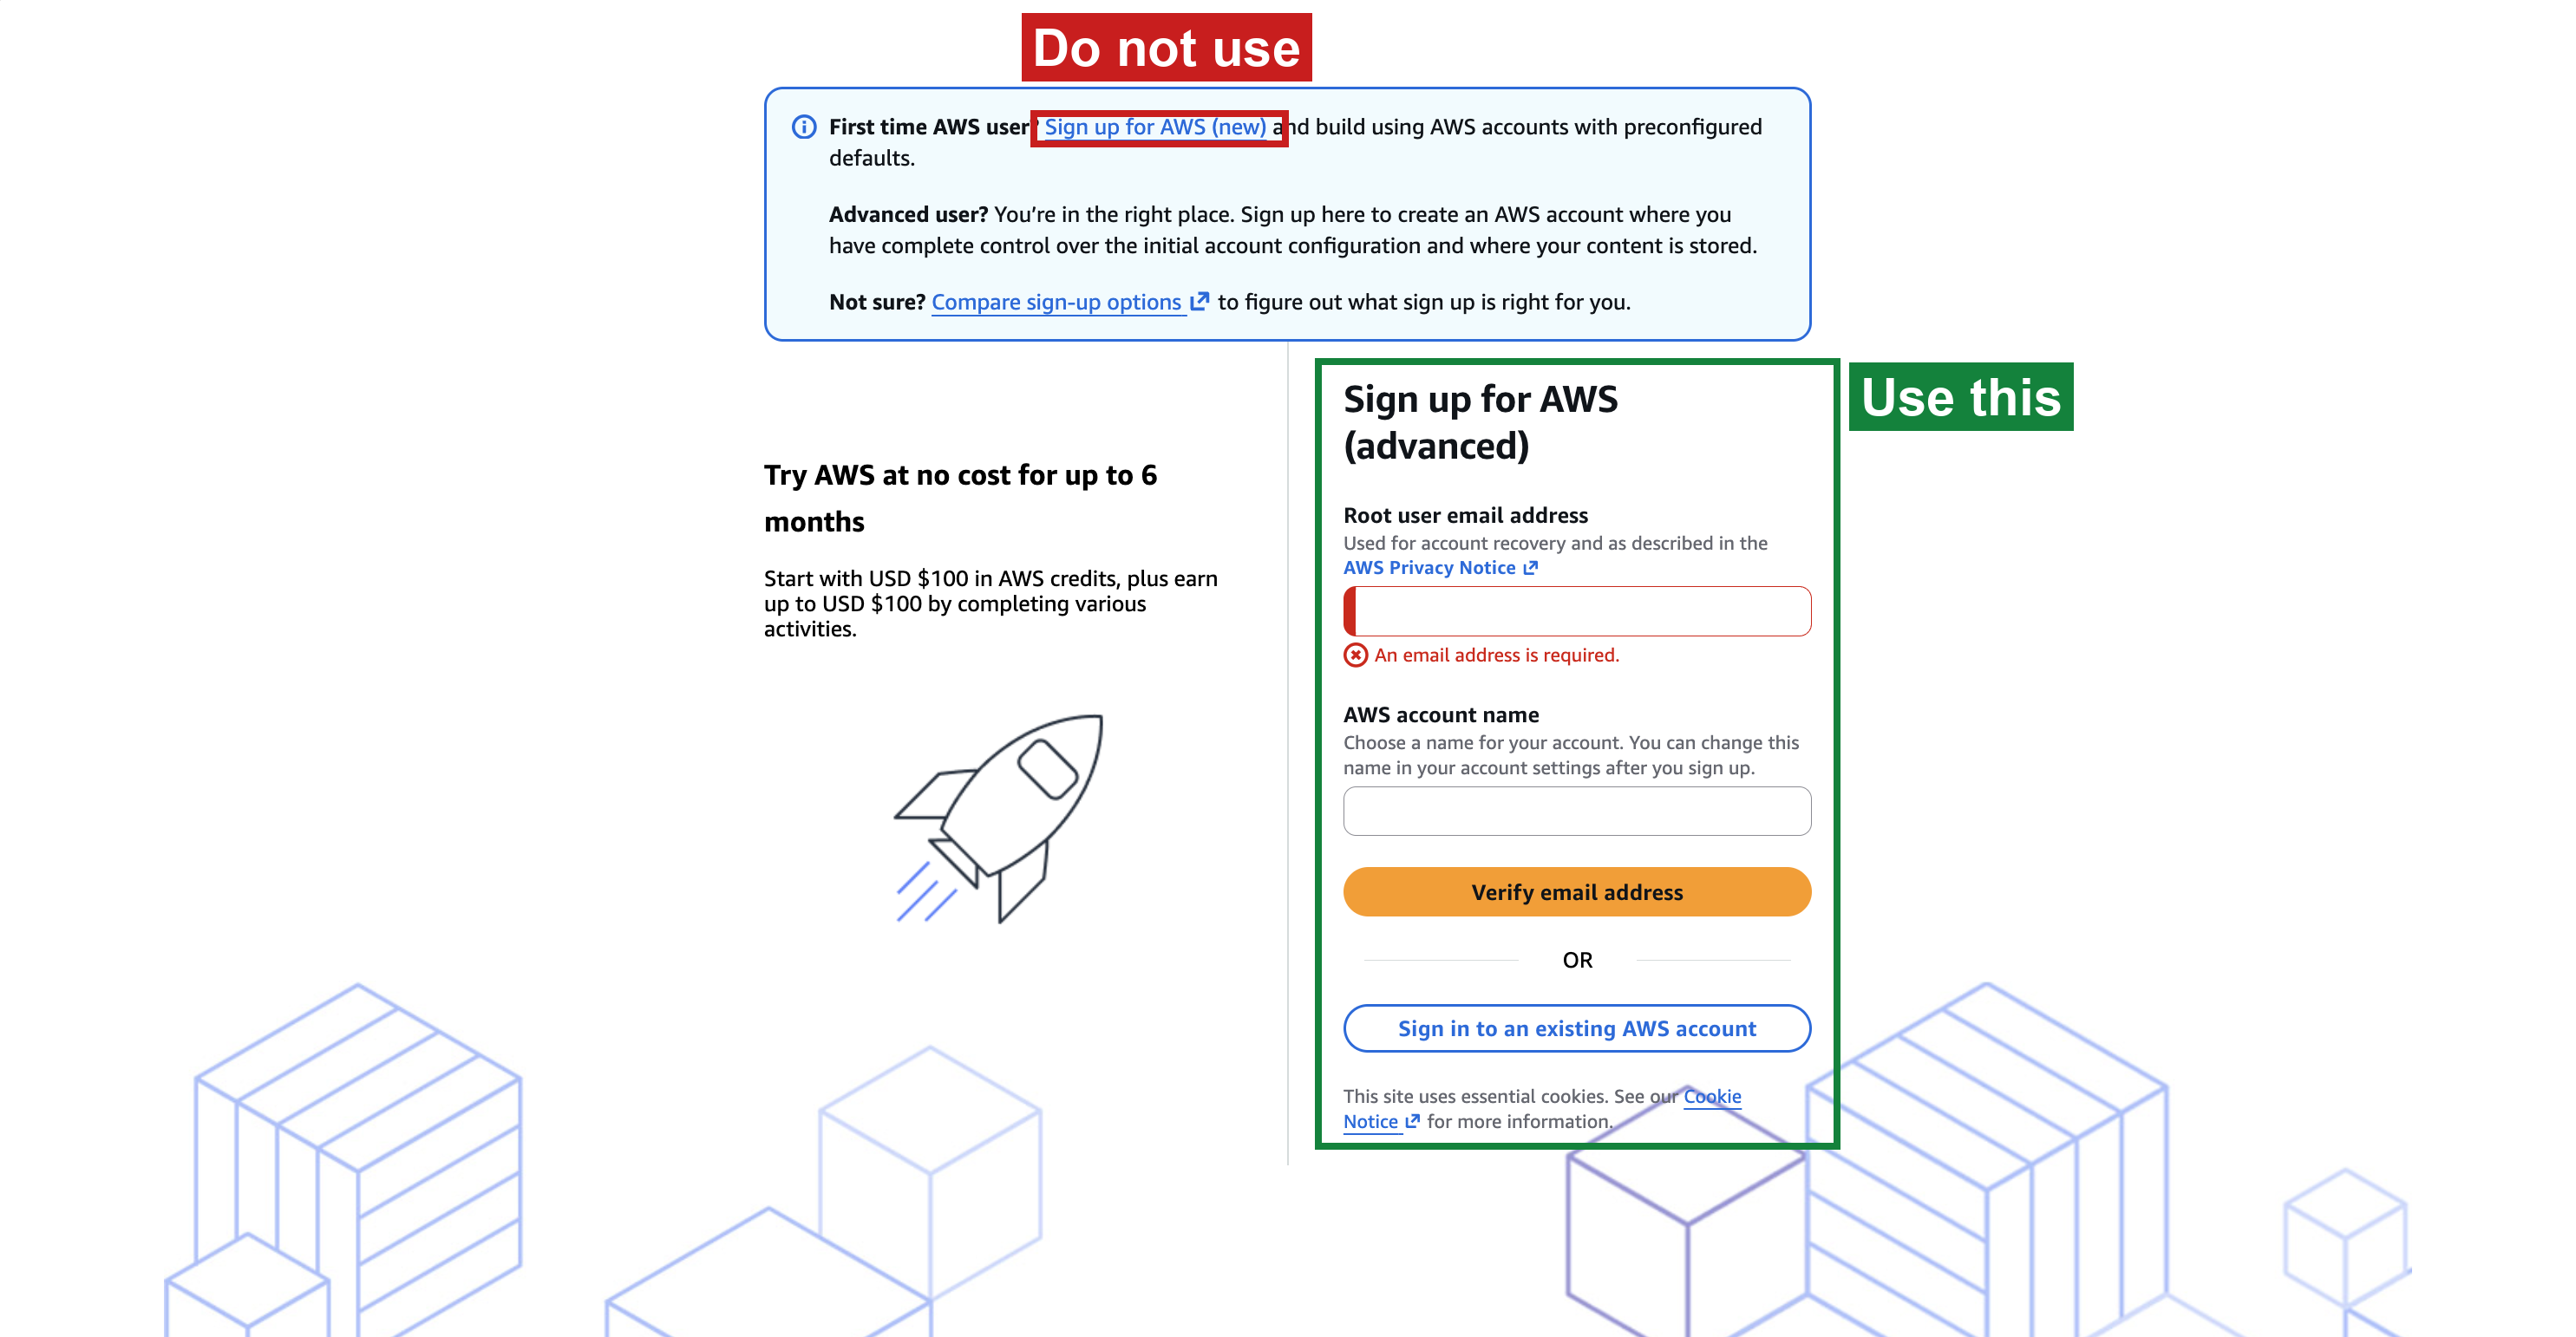
On Sign up for AWS (advanced), fill in the form on the right and choose Verify email address.
-
Finish the sign-up. You need a credit or debit card and an ID, and you get USD 100 in credits.
Already used the default sign-up? Fix your account first.
2. Sign in as an administrator
Use a user or role with administrator access.
3. Raise Lambda concurrency
New accounts can start at 10. A deployment needs 1000, or it fails with Lambda.TooManyRequestsException.
- In your deployment region, open Service Quotas → AWS services → AWS Lambda → Concurrent executions.
- If Applied account-level quota value is 10, choose Request increase at account level and request 1000.
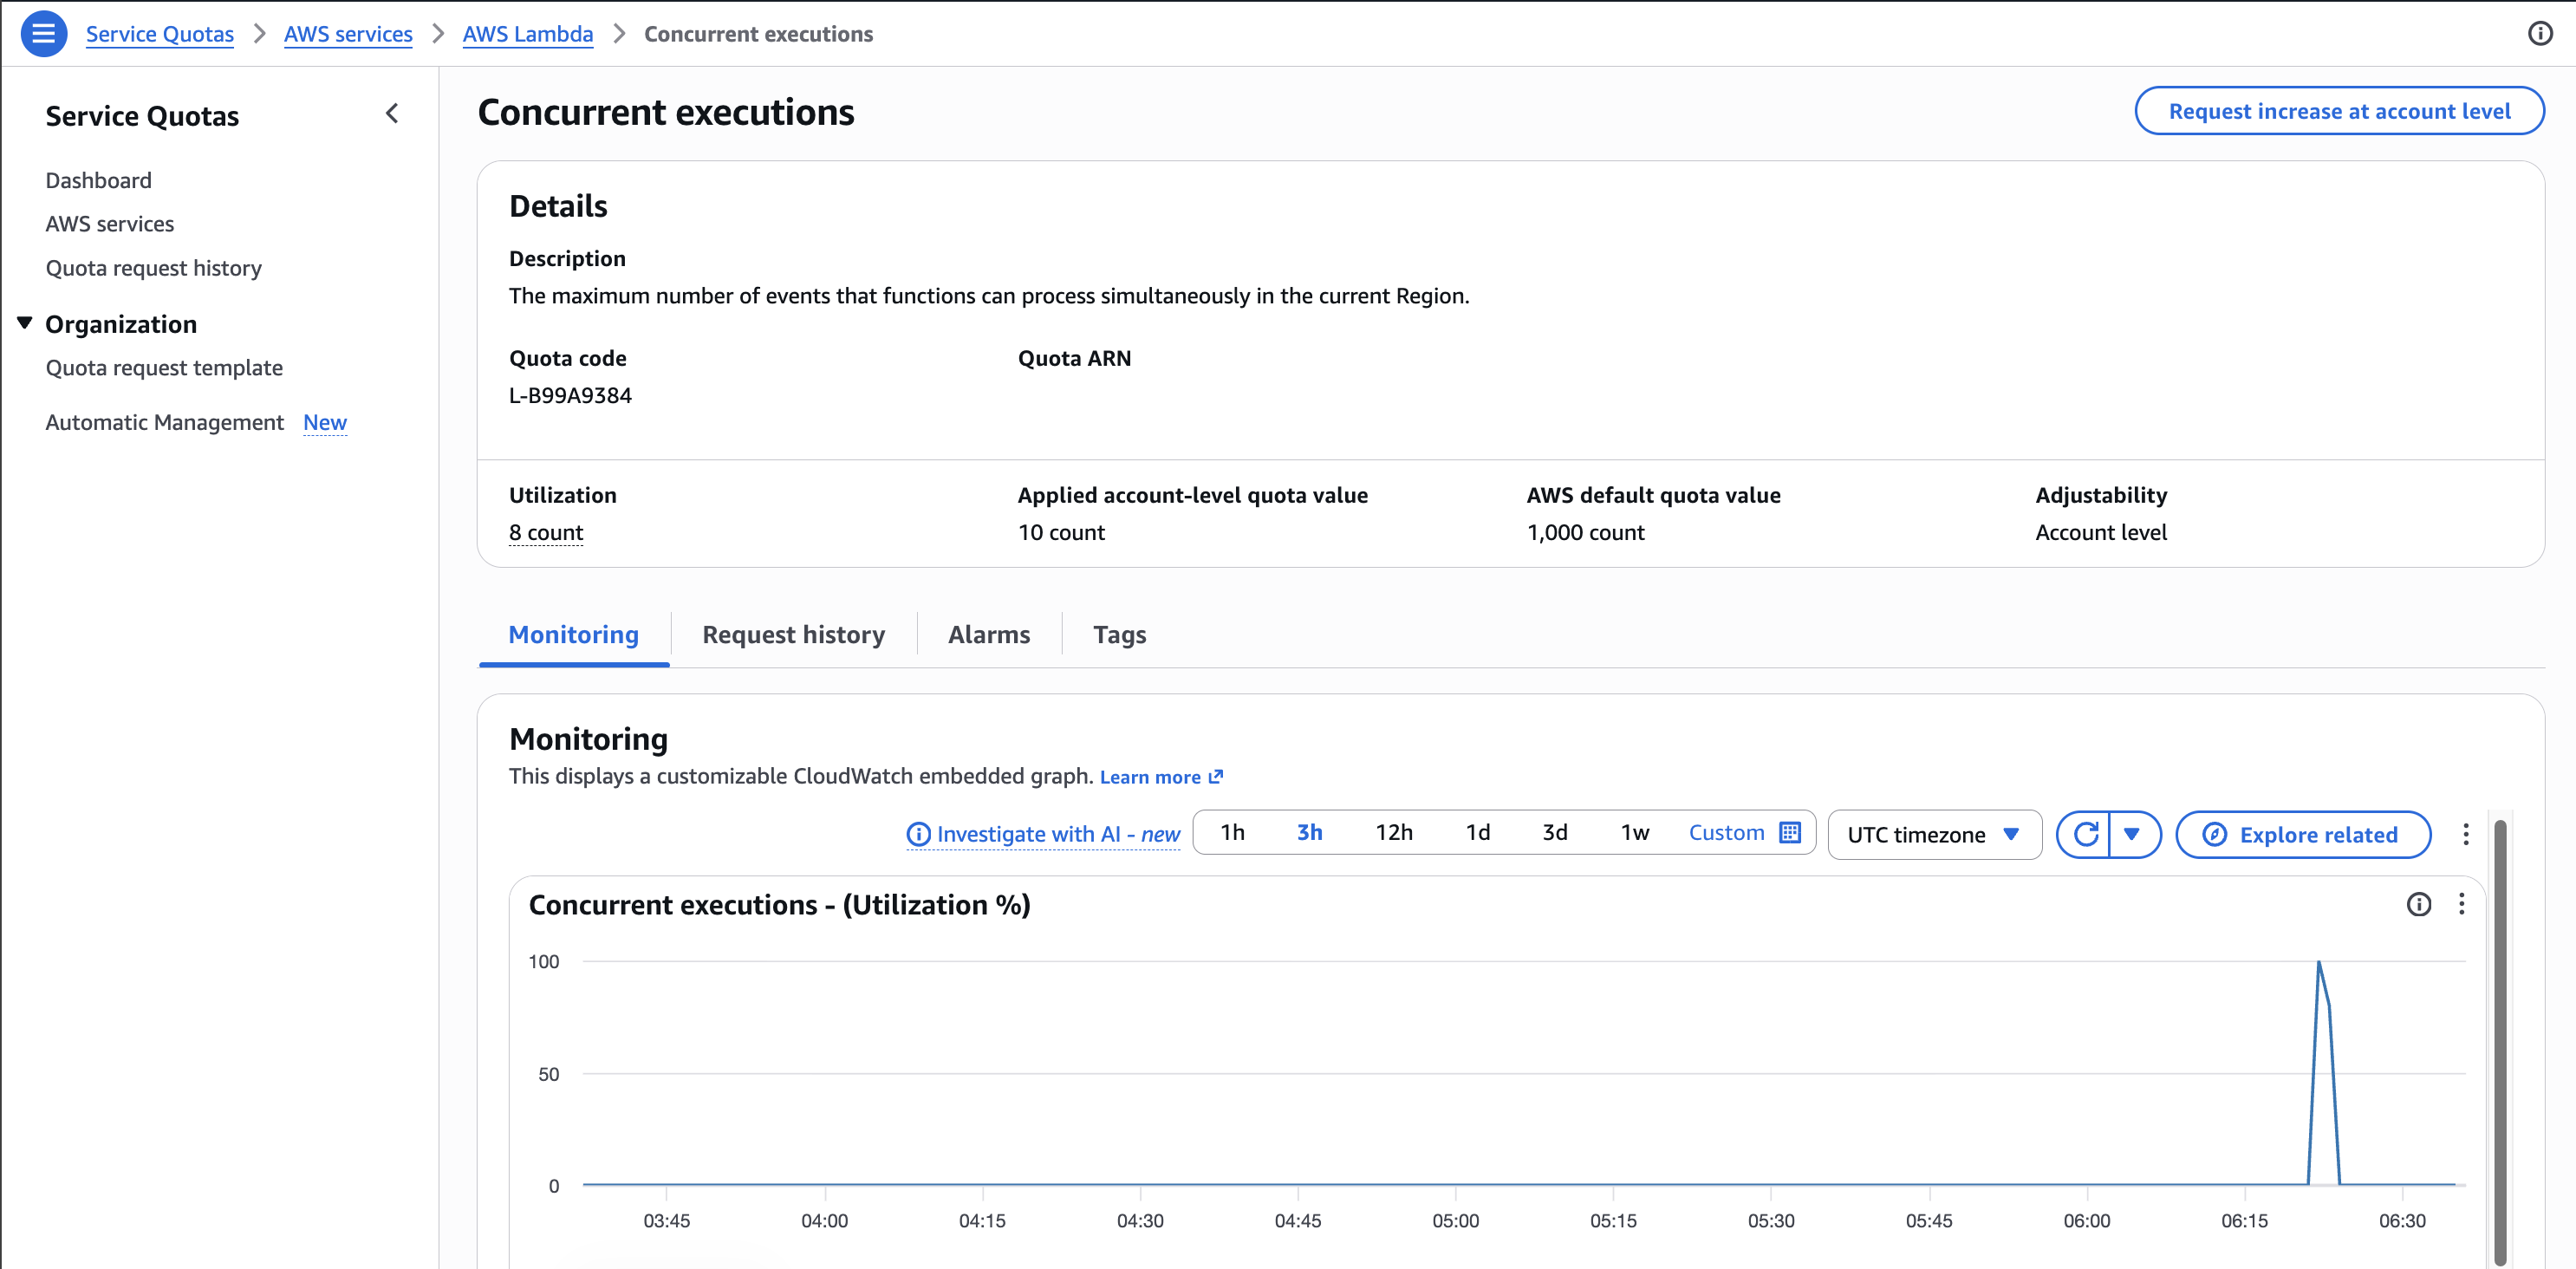
Repeat for every region you deploy to.
4. Have ready
- An admin email address, for AdminEmails
- About an hour for the deployment
- For the setup guide: Chrome or Edge, an ESP32 board, a USB data cable, and a phone with Bluetooth and ESP RainMaker Home